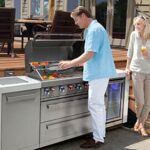
Few things crush the momentum of a backyard barbecue faster than a sudden, mid-cook propane shortage. You are right in the middle of searing a prime cut of meat, the burners sputter, and you are forced into an emergency run to the local convenience store to swap a heavy tank.
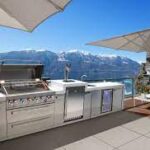
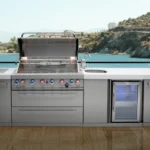
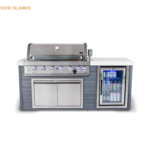
If you own or are planning to buy a Mont Alpi modular outdoor kitchen, you are likely looking for a more permanent solution. Because these setups are large, luxury installations that stay firmly anchored on your patio, a frequent question emerges: Can Mont Alpi grills be converted to natural gas?
The short answer is yes. All Mont Alpi island grills arrive pre-configured out of the box for liquid propane (LP), but they are specifically engineered to support a seamless transition to natural gas (NG). Making the switch gives you an infinite fuel supply, but executing the conversion requires a clear understanding of the parts, costs, and safety steps involved.
Why Convert a Modular Kitchen to Natural Gas?
While liquid propane is highly efficient and easily accessible, natural gas offers a completely different level of convenience and cost-efficiency for heavy outdoor cooking setups.
- Continuous Fuel Supply: You never have to track tank levels, weigh cylinders, or worry about running empty at midnight on a holiday weekend.
- Significant Cost Savings Over Time: On a per-BTU basis, residential natural gas is significantly cheaper than purchasing or refilling portable 20-pound propane cylinders.
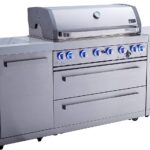
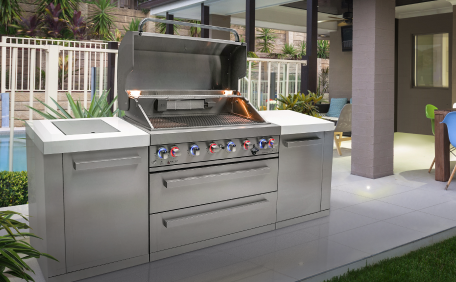
- Convenience for Multi-Burner Setups: A full Mont Alpi island doesn’t just feed a main grill head. Between the massive six-burner main grid, the rear infrared rotisserie burner, and the dedicated side burner module, a high-volume cook can deplete a standard propane tank surprisingly fast. Pipe-fed natural gas handles this high demand effortlessly.
The Core Component: The Mont Alpi MANGK Kit
You cannot simply plug a natural gas hose into a propane grill setup. Propane and natural gas operate under vastly different pressures, requiring distinct delivery hardware. Propane is highly compressed and travels through tiny orifices, whereas natural gas operates at a lower pressure and requires wider openings to achieve the same heating power.
To successfully and safely make the switch, you must use the official factory accessory: the Mont Alpi Natural Gas Conversion Kit (Part Number: MANGK).
⚠️ Critical Safety Warning
Do not attempt to modify your grill using generic, unbranded hardware store orifices. The Mont Alpi MANGK kit is specifically calibrated to match the exact BTU ratings of their proprietary burners. Using unauthorized parts can cause dangerous gas leaks, uneven flame heights, or explosive flare-ups, and it will instantly void your manufacturer warranty.
What’s Included in the Kit?
Retailing between $125-200, the official conversion kit comes completely self-contained with the precise hardware required for the changeover:
- A 10-Foot Natural Gas Hose: A heavy-duty, weather-resistant hose equipped with a quick-disconnect fitting for easy hookups.
- A Natural Gas Regulator: A dedicated pressure regulator calibrated specifically for residential gas line pressures.
- The Jet Conversion Tool: A specialized hex tool engineered to reach deep into the burner valves to swap the internal orifices.
The Step-by-Step Conversion Process
Converting a Mont Alpi island requires altering three distinct zones: the main tube burners, the rear infrared rotisserie burner, and the side burner cabinet. While it sounds intimidating, the actual mechanical adjustment follows a clear logical sequence.
1.Shut off and isolate the system:Safety First.
Ensure all control knobs are turned to the absolute OFF position. Disconnect the liquid propane cylinder, remove it completely from the cabinet drawer, and safely store it away from the work zone.
2.Remove the internal grill components:Clearing the Cookbox.
Open the grill hood and remove the heavy cooking grates, the flame tamers (heat deflectors), and the warming racks. This exposes the straight stainless steel burner tubes underneath.
3.Extract the burner tubes:Accessing the Jets.
Locate the cotter pins or retaining screws at the rear back-wall of each burner tube. Remove them carefully, slide the burner tubes backward and upward, and lift them out of the cookbox to reveal the brass propane orifices sticking out of the front control valves.
4.Swap the main orifices:The Orifice Changeover.
Using the specialized jet tool provided in the MANGK kit, unscrew each brass propane orifice counter-clockwise. Replace them with the larger, natural gas orifices included in the kit, tightening them firmly to prevent gas weeping. Reinstall the burner tubes and securing pins.
5.Convert the specialty burners:Rotisserie & Side Burner.
Locate the access panel for the rear infrared rotisserie burner and the connection beneath the side burner module. Use the jet tool to swap these specific orifices out for their corresponding natural gas counterparts.
6.Install the new line & leak test:Final Verification.
Remove the LP regulator assembly from the manifold. Thread the new natural gas regulator and the 10-foot hose onto the grill intake. Connect it to your home’s gas supply outlet. Brush a 50/50 mix of dish soap and water onto all new connections, turn on the gas, and look for growing bubbles. If no bubbles appear, you are completely leak-free and ready to fire up.
The Financial Reality: DIY Setup vs. Professional Plumber
While the physical swap of the orifices inside the grill is a manageable afternoon project for a handy homeowner, hooking the system up to your home’s main gas supply is not a DIY task.
Natural gas lines operate under strict local building codes. To protect your home insurance policy and guarantee structural safety, you should hire a licensed plumber or gas technician to handle the final supply drop.
| Cost Element | DIY Attempt | Professional Professional Hookup |
| MANGK Conversion Kit | $125 | $125 |
| Main Line Extension | Not recommended (Code Violations) | $300 – $800 (Depending on distance from meter) |
| Permits & Inspection | N/A | $50 – $150 (Varies by municipality) |
| Liability Coverage | Zero protection if a leak occurs | Full structural insurance backing |
While hiring a professional adds an upfront cost of a few hundred dollars, it ensures your gas line can handle the aggregate BTU load of the kitchen without dropping pressure when your home’s furnace or water heater kicks on simultaneously.
The Propane Alternative: The Built-In Slide Out Drawer
If running a dedicated natural gas pipe across your concrete patio or digging a trench through your manicured lawn proves structurally impossible or financially impractical, Mont Alpi provides an excellent fallback system.
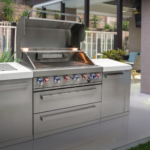
Inside the cabinet directly beneath the main grill head, the engineers built a heavy-duty, roller-guided slide-out propane tank drawer.
Instead of forcing you to awkwardly lift and lean a heavy 20-pound steel cylinder into a dark, cramped cabinet corner, the drawer glides entirely outside the footprint of the island. You simply drop the tank straight down onto the molded ring, secure the safety screw, connect the hand-tighten LP regulator, and slide it back into place with zero lower-back strain.
Final Verdict: Should You Convert Your Mont Alpi?
If your Mont Alpi outdoor kitchen sits on a permanent patio close to an accessible home gas stub, investing in the natural gas conversion is a complete no-brainer. It elevates a high-end luxury appliance into a truly permanent, effortless outdoor cooking station that operates seamlessly for decades.
Just remember to purchase the official MANGK kit, take your time meticulously swapping out the internal orifices, and leave the final connection to a licensed pro. Turn the page on empty tanks forever and focus entirely on mastering your backyard culinary craft.